
Electrical Upgrades
Landscape lighting not only enhances the visual appeal of your outdoor space but also plays a vital role in improving safety and security.
Natasha Guernsey • March 7, 2025
Landscape security Lighting
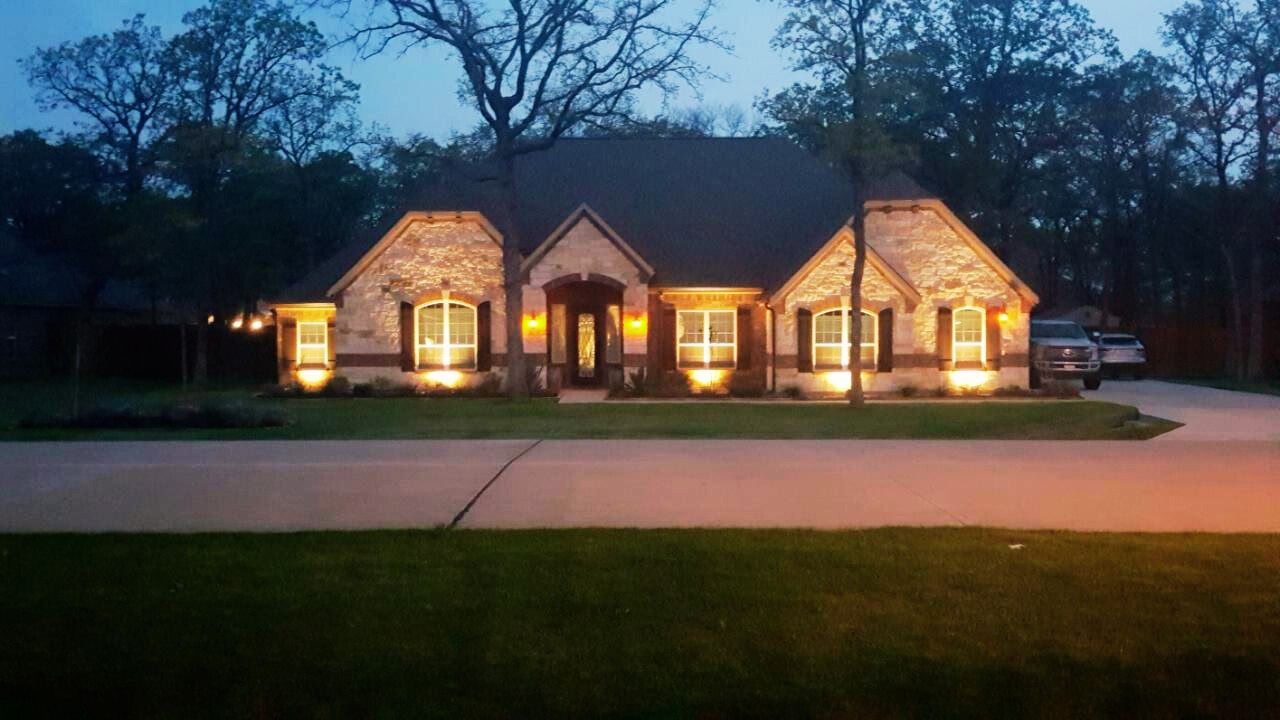
Landscape lighting not only enhances the visual appeal of your outdoor space but also plays a vital role in improving safety and security. Strategically placed lights illuminate walkways and entry points, minimizing the risk of trips and falls. Additionally, a well-lit yard serves as a deterrent to trespassers, making your home a less appealing target for intruders.
Here’s a brief look at how landscape lighting contributes to safety and security:
It creates a welcoming ambiance for evening gatherings while ensuring safe navigation through your garden after dark. Moreover, it allows you to care for your seasonal plants at any time, maximizing your gardening experience.
While many homeowners prioritize high-tech security measures such as surveillance cameras and smart locks, outdoor lighting is often overlooked. Beyond its decorative function, it plays a key role in reinforcing home security. This guide explores the various ways landscape lighting can help safeguard your property.
By keeping outdoor areas well-lit, landscape lighting discourages intruders from attempting to approach unnoticed. A home surrounded by bright lighting, particularly around its perimeter, pathways, and entrances, significantly reduces the chances of unauthorized access. In contrast, dimly lit or shadowy areas provide cover for trespassers, making your property more vulnerable to security risks.

Planning an outdoor kitchen? Your grill may be the centerpiece, but don’t forget the appliances and equipment that make the space truly functional.

Plan the Electrical Path Before Building Your Outdoor Kitchen

Safe Outdoor Kitchen Electrical Wiring in Frisco, Plano, McKinney, North Dallas, Allen, Carrollton, Lewisville, Prosper & Celina, TX

Plan Your Outdoor Kitchen Electrical Needs Before You Build

Outdoor Kitchen Electrical Services in Frisco, Plano, McKinney, North Dallas, Allen, Carrollton, Lewisville, Prosper & Celina, TX

Outdoor Kitchen & BBQ Electrical Services in Frisco, Plano, McKinney, North Dallas, Allen, Carrollton, Lewisville, Prosper & Celina, TX

Effective Landscape Lighting Placement for Design in Frisco, Plano, McKinney & North Dallas, TX

Enhance your outdoor living space with elegant post cap lighting installation from Light It Up Electric. We provide custom outdoor lighting solutions for homeowners and businesses throughout Frisco, Plano, McKinney, Allen, Carrollton, Lewisville, Prosper, Celina, and North Dallas, TX.

Enhance your property’s safety, curb appeal, and nighttime ambiance with professional bollard lighting installation from Light It Up Electric. We provide custom outdoor lighting solutions for homeowners and businesses throughout Frisco, Plano, McKinney, Allen, Carrollton, Lewisville, Prosper, Celina, and North Dallas, TX.

Professional Well Light Installation in Frisco, Plano & North Dallas, TX